Table of Contents
Introdocution
On my wall there is a Hema pictureframe, there is a picture in it and it illuminates light?!?
Yup, it does, that's because I have a so called digital pictureframe. A combination of an old laptop refitted into a pictureframe. It is a true example of socially accepted geekdom and has quite a wowfactor with anyone visiting. Including chicks calling out 'you've got to get me one of those!'1). Here is the sales pitch and some technical details.
Sales pitch
It's cool and you want one! Look at it, it's beautiful!
Goals
- Digital pictureframe
- Dead silent
- Open source software
- Bluetooth interface
- Cheap (made of parts I have laying around)
Hardware
- Hema pictureframe
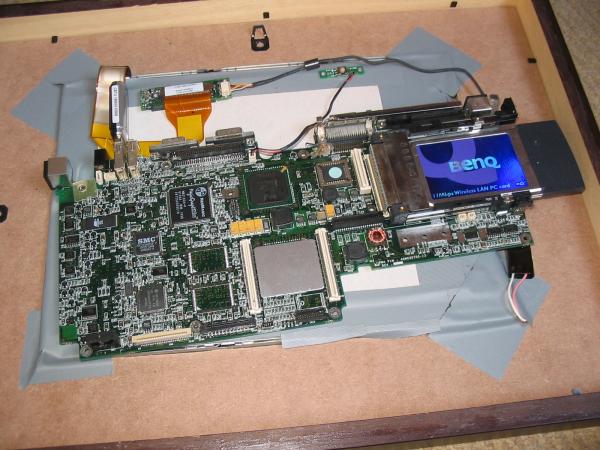
- Compaq presario 1615 laptop
- P150 (passively cooled)
- 96MB ram
- 20GB harddrive
- DSCN LCD screen 800×600
- Benq AWL100 WiFi card (PCMCIA)
- Conceptronic Bluetooth dongle (USB)
Software
Starting it
- Turn it on using the original power button that was extended to the top-left corner of the frame (backside).
- Wait a bit for
- the BIOS
- Linux kernel
- Debian startup scripts
- Xwindows
- Feh
- Then the first image appears and every minute there is a refresh.
How did I build it (hardware)
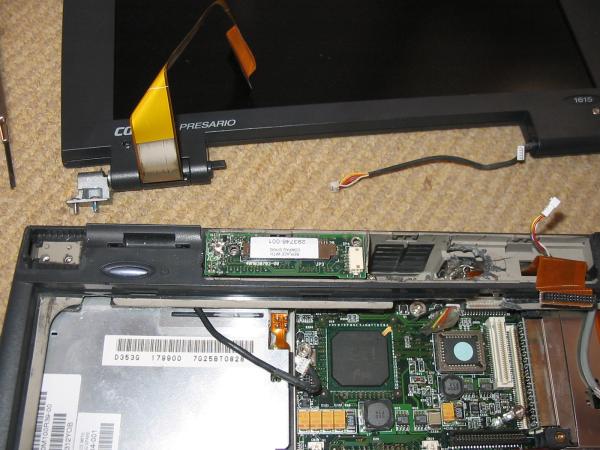
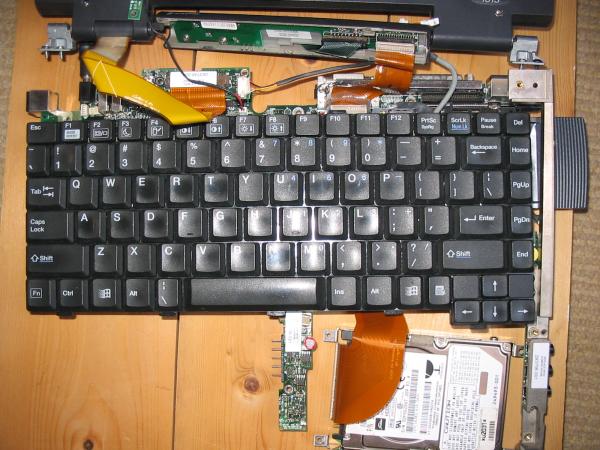
- Ripped apart the laptop
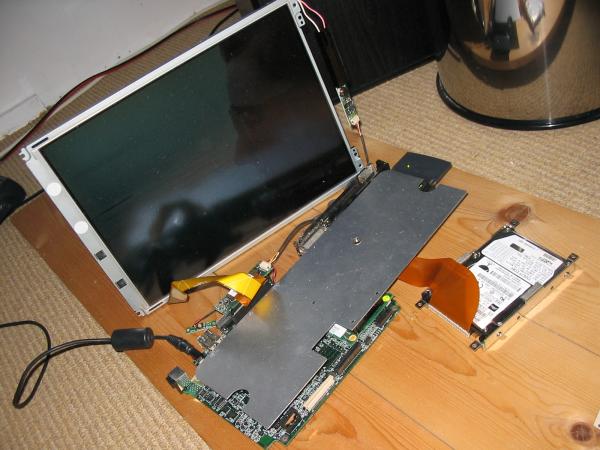
- Rebuild it without the case and all stuff not needed. Tested if it's still working and it did! A minor snag was that the BIOS battery had died and so after every boot the system 'forgot' that I told it to boot without a keyboard. After a quick battery switch this was solved.
- After this the project halted for some time waiting for a suitable frame that's not that expensive, not that ugly and about the right size.
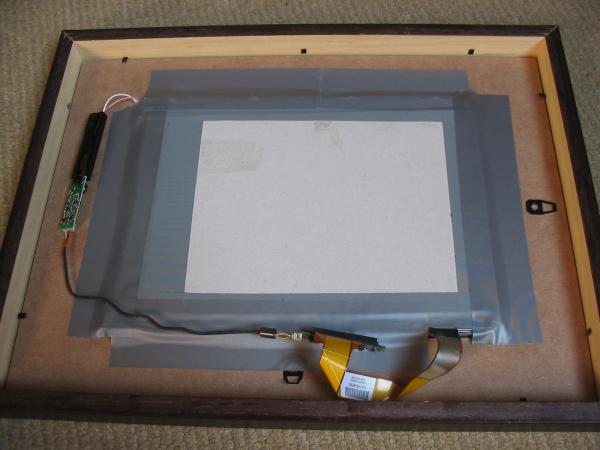
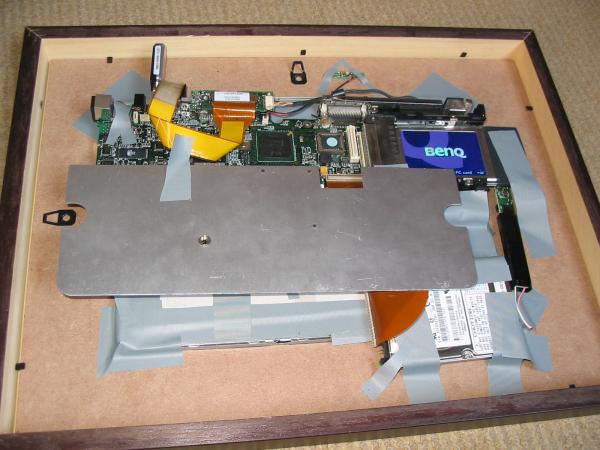
- The frame I found is really sturdy in construction and has a nice hardboard back-cover (originally ment to keep the picture flat). Using a stanley knife (a saw would have been better but I didn't have one handy) I made a hole in it the same size as the LCD monitor so the front of the screen is flush with the hardboard. Then I taped the frame in place with generous amounts of duct tape.
- Now I had a sturdy base to stick the rest of the components to. The harddisk and mainboard were taped on, again with lots of tape to prevent it from sliding or falling off completely.
How did I build it (software)
- Installed Debian Linux testing via the (then still connected) cdrom drive onto the hard drive.
- I did some fiddling around to get a framebuffer image viewer running (to remove X nessessety and thus a lot of overhead) but that didn't work out. I couldn't vind a good enough image viewer with slideshow, there was one but that had a noticable pause between images because of the slow hardware I was using.
- Installed X.org (note: not Xfree86) and the $$simple$$ window manager.
- Installed GTKSee
- Modified the ~/.gtksee file to make the image change frequency lower, gone from 5 seconds to one minute.
- Created a bunch of shell scripts to automate the managing of the different 'albums'. I still want to make a nice bluetooth interface for this.
Things I learned
- The default image refresh rate is 5 seconds, that's disrupting in low-light conditions (a dark image after a light one catches your eye), this flashing is still noticable with a longer delay and I'm looking for semi-intelligent ways to make a transition between two images less abrubt.
- Finding the right frame can take quite some time and patience.
Ideas
- Use this interface for bluetooth access.
- For harddrive spindown using ext3 use laptop mode tools in stead of noflushd which doesn't work.
1)
actually happened!
